Version Française
9. From AOR to PPR
How to check your status and understand what each update means
Home > Work in Canada > Permanent Residency > Express Entry: The Ultimate Guide > Express Entry: Step-by-Step Guide > 9. From AOR to PPR

The best and most precise way to know the status of your application is to order GCMS Notes: our GCMS Guide will help answer all your questions! You can now also order your GCMS Notes with Just For Canada ! |
Once you have uploaded all requested documents, the system will take you to pages related to Declaration, Disclosure and Electronic signature. “Agree” to the Declaration, Disclosure and Electronic signature pages and you will see a table with a summary of fees that you need to pay for your e-APR. You can pay your fees using Visa, American Express or Mastercard credit card.
How much will you have to pay?
There are three fees that you will have to pay:
1. The Processing Fee for you and your family members
When you apply, you need to pay a processing fee for everyone who will come to Canada with you on your application. The processing fee is $950 per person, and $260 for each dependent child.
IRCC won’t refund the processing fee once they have begun processing your application. If your application isn’t complete, IRCC will refund your processing fee.
2. The Right of Permanent Residence Fee
The right of permanent residence fee is $575 per person. There is no fee for dependent children. You can either pay this fee early on at the same time as your Processing Fee, or when IRCC approves your application. Paying this fee early may speed up the application process.
IRCC will refund this fee if you withdraw your application or if your application is refused.
3. The Biometrics fee
You and your family members will most likely need to provide biometric data. For an individual applicant, the cost is $85, and for a family applying jointly, the fee is up to $170. You can find more information on Biometrics in this page.
For more information on how much would Express Entry cost you, check out this page.
Receiving your Acknowledgment of Receipt (AOR)
After submitting your electronic Application for Permanent Residence (e-APR), you will receive an “Acknowledgement of Receipt (AOR)” which serves as a confirmation that your application for permanent residence in Canada was received by Immigration, Refugees, and Citizenship Canada (IRCC) and they have created a file with your application number. This is more popularly called as AOR date and is the date from when your 6 months intended processing time begins.
After your AOR you must report any significant change to your circumstances to IRCC, such as a change:
After your AOR you must report any significant change to your circumstances to IRCC, such as a change:
- in circumstances such as the loss of a job offer or a Provincial or Territorial nomination,
- in family composition including newborn children, adopted children, divorce, marriage etc,
- of address, including change of e-mail address, or
- of immigration representative.
Status updates from AOR to PPR
Generally, your application will follow the following path after receiving the AOR. This is the trend which is happening with most of the applicants. It may or may not match with your application process:
- Background check: Not Applicable (NA1) - As soon as you submit your EE application, and receive your AOR, the "Background check" section of your application status will say "Not applicable.". This status will generally not change until your medical results are reviewed and validated.
- Review of medical results: Medicals passed (MEP) - Approximately one month after your AOR, you should receive this message: “You passed the medical exam“. It will typically take more time for applicants with a provincial nomination.
- Background check: In Progress (IP1) – Either the same day, one or two days after the MEP update, your "Background check" section will change to “Your application is in progress. We will send you a message when we start your background check.”.
- Background check: Not Applicable (NA2) – After your IP1 is finished, your "Background check" section will revert to "Not Applicable.". Most of the time, IP1 only takes a few hours, and if you do not check your account during that short window, you will miss the update.
- Background check: In Progress (IP2) – The "Background check" status message will change to “We are processing your background check. we will send you a message if we need more information“. After completion of the IP2 stage, the Passport Request (PPR) e-mail is sent if the applicant already paid the Right of Permanent Residence Fees upfront. PPR e-mails are taking 7-20 days after the IP2 stage.
- Background Check: Not Applicable (NA3) – This means that IP2 is finished. This "Background check" status will not be displayed in some cases, and PPR is triggered while the IP2 status is still visible.
- PPR: Passport Request - You will receive the golden e-mail directly to your e-mail account and you may not get an update in your Express Entry account. You should check your junk e-mail folder, as the e-mail does not come from IRCC but from your country's embassy (usually).
- CoPR: Confirmation of Permanent Residence
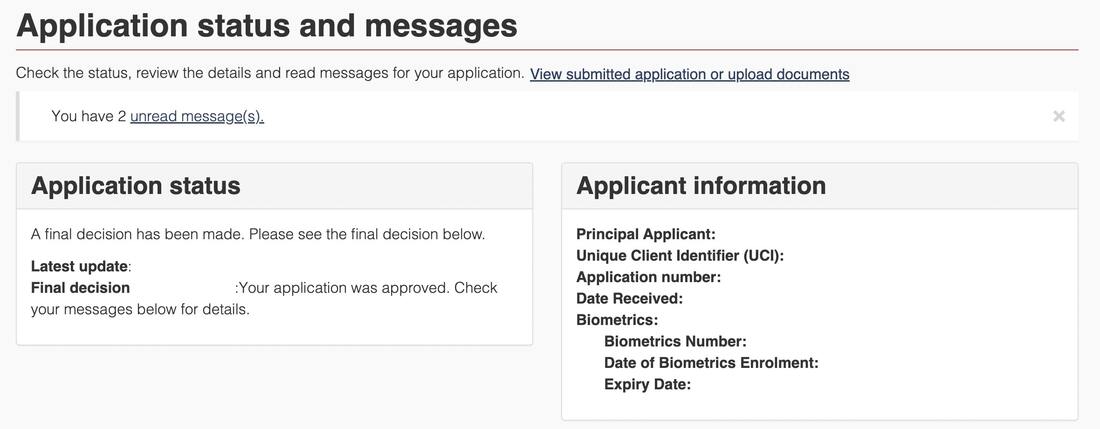
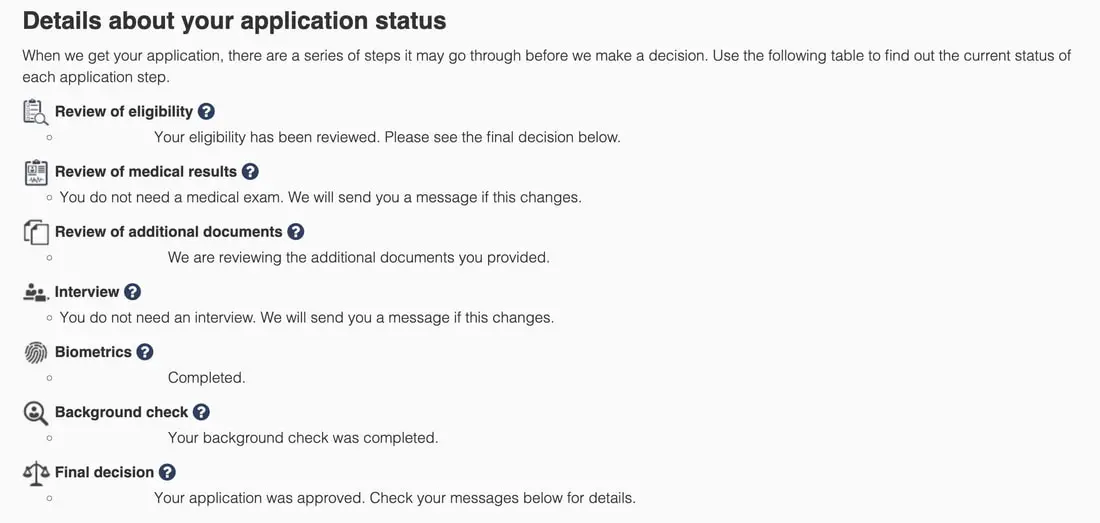
Application Status page
Processing Times
Immigration, Refugees and Citizenship Canada (IRCC) has a target service standard of processing 80% of Express Entry permanent residence applications within 6 months.
From April 2022 to March 2023, IRCC processed
You can check the current average processing times for an Express Entry permanent residence application here.
You need to select "Economic immigration", then "Skilled workers (federal)", or "Canadian Experience Class", or "Skilled trades (federal)", or "Provincial Nominees".
From April 2022 to March 2023, IRCC processed
- 80% of applications within the 6-month standard for the Federal Skilled Workers (FSW) program.
- 85% of applications within the 6-month standard for the Canadian Experience Class (CEC).
- No application was submitted under the Federal Skilled Trades (FST) program.
- 70% of applications within the 6-month standard for the Provincial Nominee Program (PNP).
You can check the current average processing times for an Express Entry permanent residence application here.
You need to select "Economic immigration", then "Skilled workers (federal)", or "Canadian Experience Class", or "Skilled trades (federal)", or "Provincial Nominees".
Express Entry Step-by-Step Guide
Click here to learn all about Canada, city guides, the healthcare and education systems, what not to forget when packing.
If you want to learn what you need to do and what you need to know upon arrival in Canada, check out this page.
If you want to learn what you need to do and what you need to know upon arrival in Canada, check out this page.
1. Finding your NOC (National Occupational Classification)
To be eligible, you need to first check that you work experience, as defined by the NOC system, is eligible for Express Entry.
Go to step 1.
Go to step 1.
2. Getting your Educational Credential Assessment (ECA) if you credential is not Canadian
You need to get your foreign educational credential assessed by one of IRCC's approved third parties.
Go to step 2.
Go to step 2.
3. Taking your English and/or French language tests
For all the three Express Entry programs, you need to take English and/or French test(s) and score a number of points to be eligible.
Go to Step 3.
Go to Step 3.
4. Checking your eligibility to Express Entry
Check if you eligible to Express Entry under one of the three economic immigration programs.
Go to Step 4.
Go to Step 4.
5. Calculate your Comprehensive Ranking System (CRS) score
You need next to understand how to calculate your Comprehensive Ranking System (CRS) score. This score is the one you will be ranked with in the Express Entry pool.
Go to Step 5.
Go to Step 5.
6. Getting into the Express Entry Pool
After taking your language exam(s), and getting your ECA (if your credential is not Canadian), you need to verify your eligibility through the Come to Canada Tool and then create your Express Entry profile to get into the pool of applicants.
Go to step 6.
Go to step 6.
7. Receiving an Invitation to Apply (ITA)
If you have enough CRS points, you will get an Invitation to Apply. You will have 60 days to fill additional forms and submit your supporting documents.
Go to step 7.
Go to step 7.
8. Your document checklist: Tips and Advice
After receiving you Invitation to Apply (ITA), you will need to upload the requested supporting documents. Get ahead and make sure you will not have a problem gathering them.
Go to step 8.
Go to step 8.
9. From Acknowledgement of Receipt (AoR) to Passeport Request (PPR) - YOU ARE HERE
After submitting your documents, learn about the process of approval of your application and the different updates that will let you have an idea on where you application is at.
10. Preparing your landing in Canada
Check out our before landing and living pages, to learn all about Canada, its biggest cities, its healthcare and education systems, what things to do first when arriving in Canada, etc.